
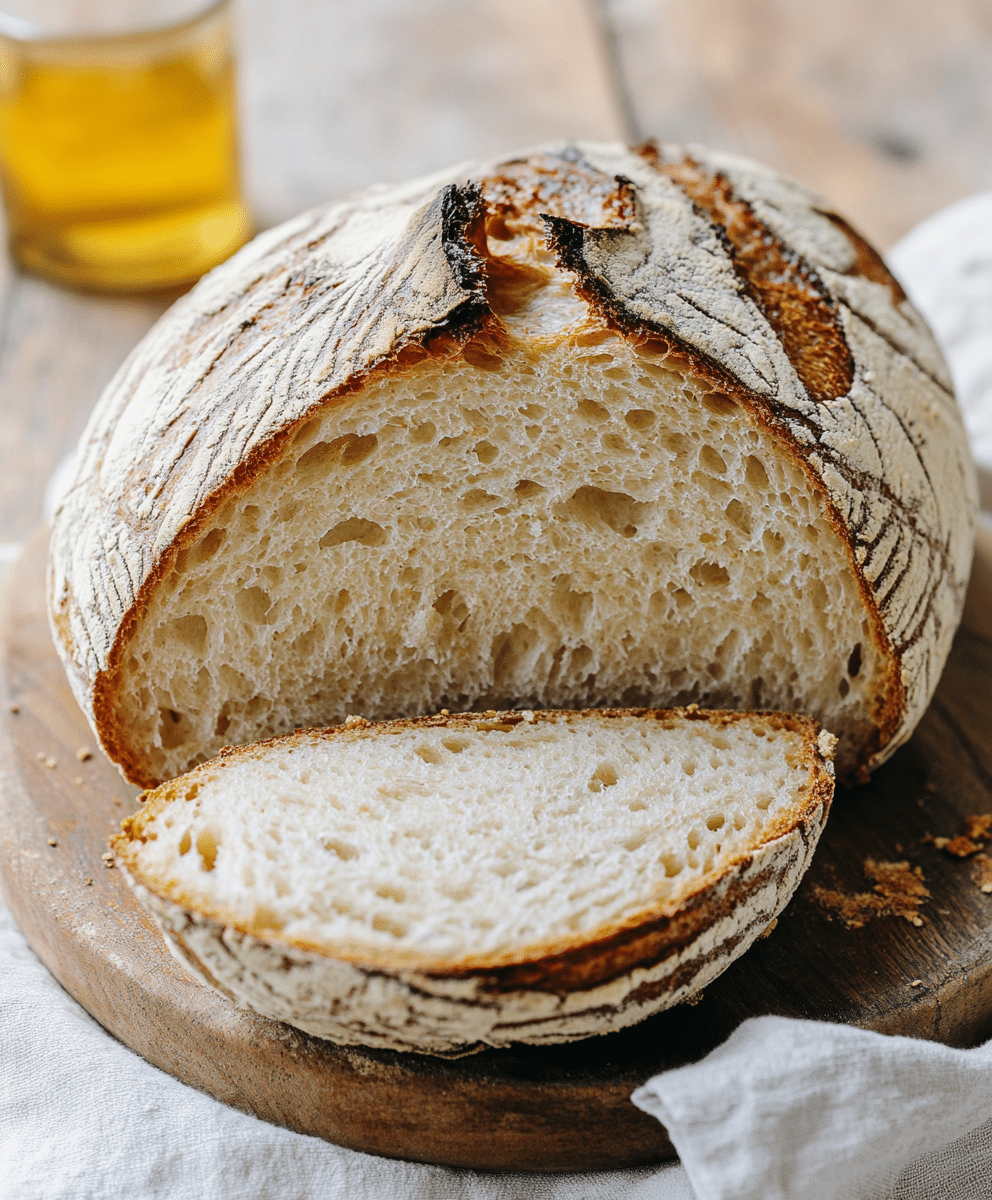
There's something magical about the scent of homemade sourdough bread baking in the oven. The golden crust crackles just right, the crumb is soft and airy, and the tangy flavor delivers a satisfying depth you just can't get from store-bought loaves.

I first fell in love with sourdough during a rainy spring weekend when I decided to finally put my neglected starter to use. What began as a quarantine project has turned into a beloved ritual that fills my kitchen with warmth and my heart with pride.
Whether you're new to bread baking or looking to perfect your artisan loaf, this recipe offers a simple, rewarding process that fits into even the busiest schedules. Let's dive in!
Why You'll Love This Homemade Sourdough Bread
Making sourdough from scratch might sound intimidating, but this recipe proves it doesn't have to be. It blends traditional techniques with modern simplicity for a result that's both beautiful and delicious.
First off, this bread is naturally leavened, meaning no commercial yeast is required. The wild yeast from your sourdough starter does all the heavy lifting, giving your bread a complex flavor and wonderful rise.
It's also surprisingly low-maintenance. While the fermentation process takes time, your hands-on effort is minimal. A few folds here, a rest there, and you're well on your way to a stunning artisan loaf.
This recipe is incredibly budget-friendly. With just flour, water, and salt, you can make bakery-quality bread at home for a fraction of the cost.
Lastly, it's infinitely customizable. Add-ins like herbs, cheese, seeds, or dried fruit can take this base recipe in so many exciting directions.
Whether you're baking for a special brunch or your weekly sandwich supply, this sourdough loaf is sure to impress. Now let’s break down the ingredients that make it shine.
Ingredients Notes

The beauty of sourdough lies in its simplicity. Each ingredient contributes something essential to the bread's flavor, texture, and structure.
Flour is the backbone of your loaf. I recommend using a mix of bread flour and whole wheat flour for optimal gluten development and flavor. Bread flour gives the dough strength, while whole wheat adds a hearty, slightly nutty character.
Water hydrates the flour, activates the enzymes, and helps form the gluten network. Use filtered or spring water if possible to avoid chlorine, which can inhibit fermentation.
Your sourdough starter is the magic ingredient. It’s a living culture of wild yeast and lactic acid bacteria that ferments the dough, adds flavor, and helps it rise. Make sure your starter is active and bubbly before mixing your dough.
Salt not only enhances flavor but also strengthens the gluten and regulates yeast activity. I like to use fine sea salt for an even distribution throughout the dough.
You don’t need much equipment, but a kitchen scale, Dutch oven, bench scraper, and a proofing basket (banneton) will make the process smoother and more enjoyable.
How To Make This Homemade Sourdough Bread
Crafting your own sourdough loaf may take a day or two, but each step is easy and rewarding.
Start by mixing the dough. Combine your flour and water first, then let it rest for 30 minutes in a process called autolyse. This allows the flour to fully hydrate and begins the gluten development naturally.
Next, add your starter and salt. Mix thoroughly until the ingredients are well combined. The dough should be shaggy and slightly sticky. Let it rest in a covered bowl.
Now it's time for bulk fermentation. Over the next 4 to 6 hours, perform a series of gentle stretch and folds every 30 to 45 minutes. This builds structure and strength in your dough without kneading.
After the dough has risen and feels airy, shape your loaf. Gently remove it from the bowl, shape it into a round or oval, and place it seam-side up into a floured banneton. Cover and refrigerate overnight for a cold proof.
The next day, preheat your oven and bake your bread in a Dutch oven. The steam trapped inside gives you that coveted crusty exterior. Bake until the crust is deep golden brown and the loaf sounds hollow when tapped.
From start to finish, expect about 24 hours with most of that time hands-off. The result? A stunning artisan loaf with chewy crust, airy crumb, and unbeatable flavor.
Storage Options
Sourdough bread keeps surprisingly well and can be stored in several ways depending on your needs.
For short-term storage, let the loaf cool completely, then wrap it in a clean kitchen towel or paper bag. This helps maintain the crust while keeping the crumb soft. It will stay fresh on the counter for up to 2 days.
If you need longer storage, slice the loaf and freeze the pieces in a zip-top bag. Toast them straight from frozen for a quick breakfast or sandwich base.
Avoid plastic bags unless you're aiming for a softer crust. While convenient, plastic can make the crust rubbery over time.
To reheat, simply pop a slice into the toaster or warm a whole loaf in the oven at 350°F for 10-15 minutes until the crust is revived.
Variations and Substitutions
One of the best things about this sourdough bread recipe is how flexible it is. Once you master the base, you can riff on it endlessly.
Try adding chopped olives and rosemary for a Mediterranean twist. The salty brine and herby aroma elevate every bite.
Mix in dried cranberries and walnuts for a sweet-savory loaf that pairs perfectly with creamy cheese.
Swap some of the flour for rye or spelt for a more rustic flavor. These grains add character and complexity, though they may make the dough slightly stickier.
Don’t have a Dutch oven? You can bake your loaf on a preheated pizza stone with a tray of water underneath to mimic steam.
Once you get the hang of it, feel free to experiment. Sourdough is as much about intuition as it is technique. Each loaf is a learning experience—and a delicious one at that.
So roll up your sleeves, feed that starter, and get ready to fall in love with baking bread from scratch!
PrintHomemade Sourdough Bread Recipe

Discover the ultimate Homemade Sourdough Bread Recipe — a classic artisan loaf with a chewy interior, crisp crust, and deliciously tangy flavor. This no-yeast recipe uses a natural sourdough starter to give you bakery-style bread at home.
- Prep Time: 1 hour (plus fermentation time)
- Cook Time: 45 minutes
- Total Time: 18–24 hours (including proofing)
- Yield: 1 loaf 1x
- Category: Dinner
- Method: Baking
- Cuisine: American
- Diet: Vegan
Ingredients
-
500g bread flour
-
375g water
-
100g active sourdough starter
-
10g salt
Instructions
-
In a large bowl, mix flour and water; let rest for 1 hour (autolyse).
-
Add sourdough starter and mix until incorporated.
-
Add salt and knead until smooth.
-
Cover and let rise at room temperature for 4–5 hours, performing stretch and folds every 30 minutes.
-
Shape the dough and place into a floured proofing basket.
-
Refrigerate overnight (cold proof).
-
Preheat oven to 475°F (245°C) with Dutch oven inside.
-
Score the dough and bake covered for 20 minutes, then uncovered for 25 minutes.
-
Cool before slicing.
Notes
-
Use an active, bubbly starter for best rise.
-
Adjust hydration based on flour type.
-
Cold proofing enhances flavor and texture.
-
Can be frozen once baked and cooled.
Nutrition
- Serving Size: 1 slice
- Calories: 160
- Sugar: 0
- Sodium: 210mg


Leave a Reply